Saturday, February 18, 2017

Middlemoon Creekwalk


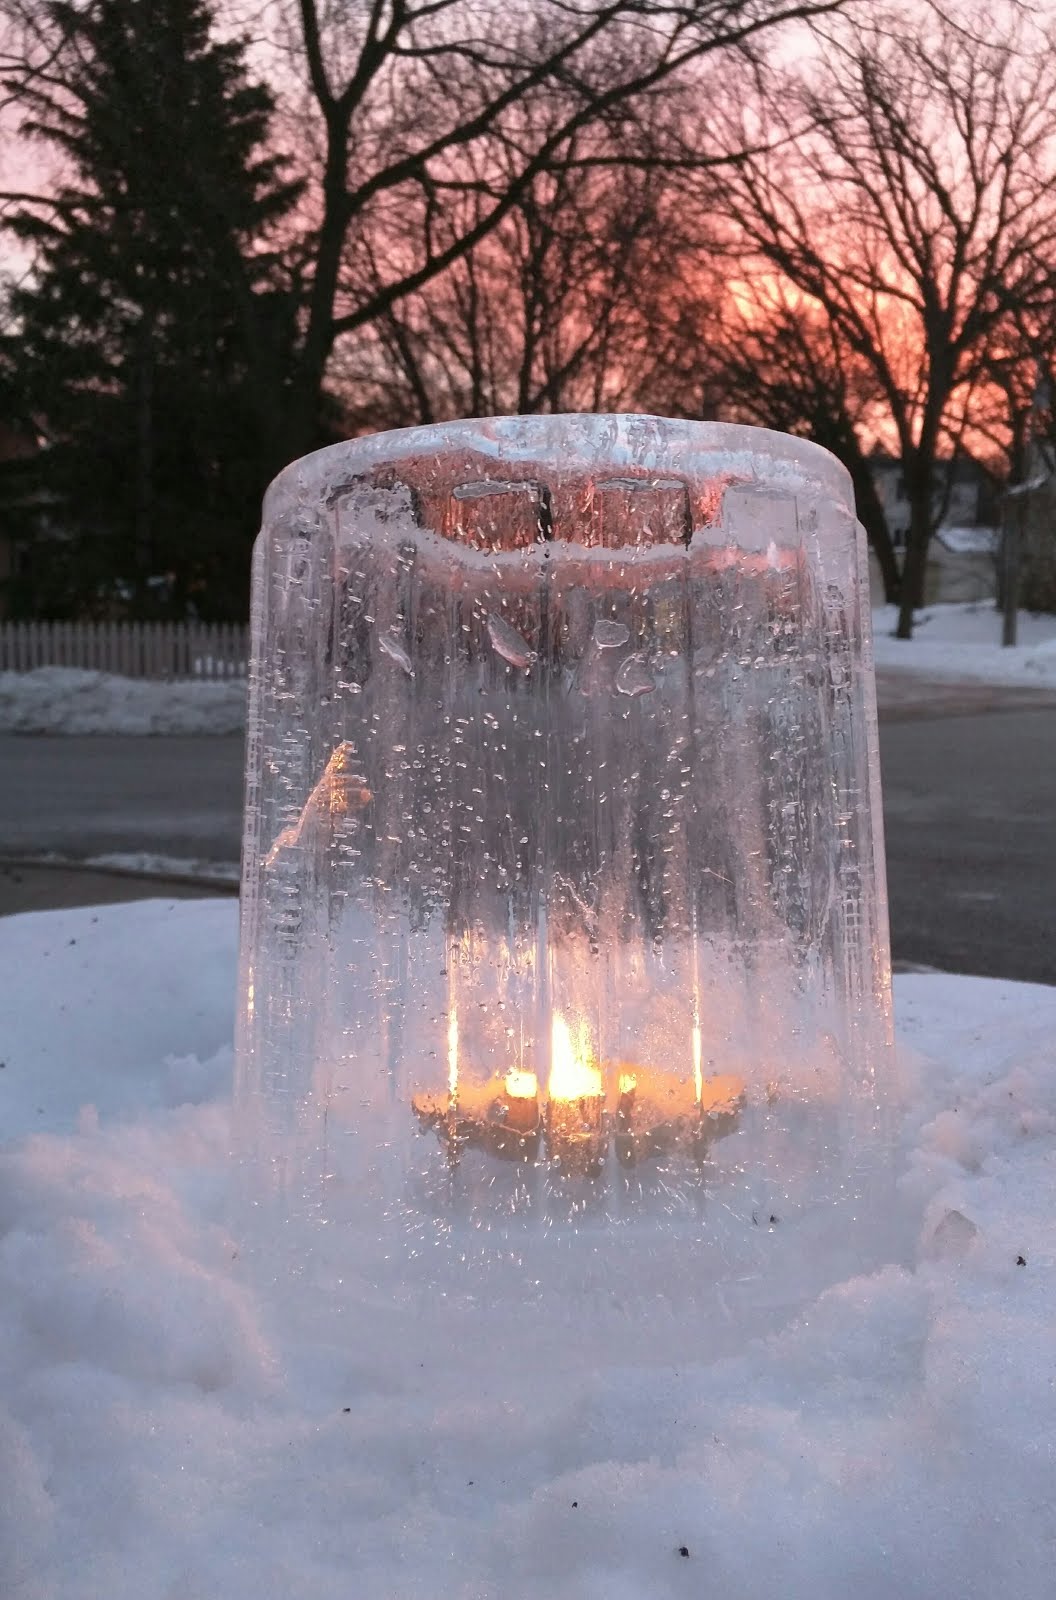
One of our favorite ice lantern events is Jen and Tom Hedberg's Middlemoon Creekwalk.

Click here for a link to their 2016 blog posting about that marvelous late-winter event.  

The Creekwalk was begun several years ago by the Hedberg family, who inspired our interest in ice luminaries in the first place.  We brought ice lanterns to that display in 2015 and 2016 when they invited the community to join them in lighting up a small creek near Lake Harriet in Minneapolis, but the main "show" is the hundreds of luminaries that Jen and Tom place along and even in the creek.  It's magical!

While the rest of the city celebrates the early spring, some of us are hoping for one last blast of winter cold and snow, so that we can enjoy the Creekwalk enchantment again this year.  If 2017 brings another opportunity to make and light ice lanterns, that link will provide up-to-date information.

The Star Tribune published an article on Jen and Tom's ice lanterns and the Middlemoon Creekwalk -- click here to see their blog entry about it.  (We were mentioned as community members who contributed ice lanterns to the 2016 Creekwalk.)

From the StarTribune February 18/19, 2017
issue (regular Saturday and early Sunday),
this article by Kim Ode celebrates Jen and
Tom's successes in the difficult 2017 ice
installation season, closing with the faint
hope of one more cold snap to let the
Middlemoon Creekwalk happen.


Friday, February 17, 2017

The Goldfish Bowl and the Ice Fishing Scene


A globe ice lantern with fish is provides 
a bit of whimsy to a winter display

 When I found an ice tray for making fish, the obvious idea was to add them to globe ice lanterns to make a fishbowl.  I fill the molds to the point of almost overflowing, make a globe ice lantern with a fairly thin wall, then "weld" the fish to the inner wall of the globe.  If they are added just after breaking the balloon, when the inside of the globe is still moist, they will simply stick in place.  Otherwise, dipping them into very cold water will make them adhere.


The ice fish glow golden in the candlelight

A Minnesota variation is the ice fishing scene.


This ice lantern was made in an IKEA Fniss wastebasket.  The bottom is open, and the fish were added by "welding" them in place on the inside with a little bit of water to moisten them.  There is a fish-hole drilled in the top, using an ordinary electric drill.  Gingerbread-man shaped ice figures were held in place with a little bit of moistened snow under their feet, and a toothpick fishing pole with a length of wire forms the fishing rod.


Because using a candle would melt and enlarge the fish-hole, this lantern is lit by placing a LED under it.

The ice-fishing scene serves primarily as a daytime decoration along the sidewalk, where its Minnesota theme is popular with passers-by.

This smaller ice-fishing scene was made with
a hexagonal ice lantern turned upside-down,
also with gingerbread-man figures fishing
through a drilled hole in the surface.

The ice-fishing scene could be lit with a candle, but that would tend to melt and enlarge the fish-hole, so I used LED lights instead.


For information on making ice globes using Wintercraft's balloons, click here.

For a general discussion of using balloons to make ice globes, click here.

To see how to find and use the ice appliques, like the gingerbread figures, click here.

Click here to return to the introductory page, with links to many other ice lantern ideas.

******************************************************************************

Middlemoon Creekwalk photos and information

Winter may be melting away too quickly in 2017, but there are many beautiful photos from the 2016 Middlemoon Creekwalk on Wintercraft's Blog HERE.


Monday, January 16, 2017

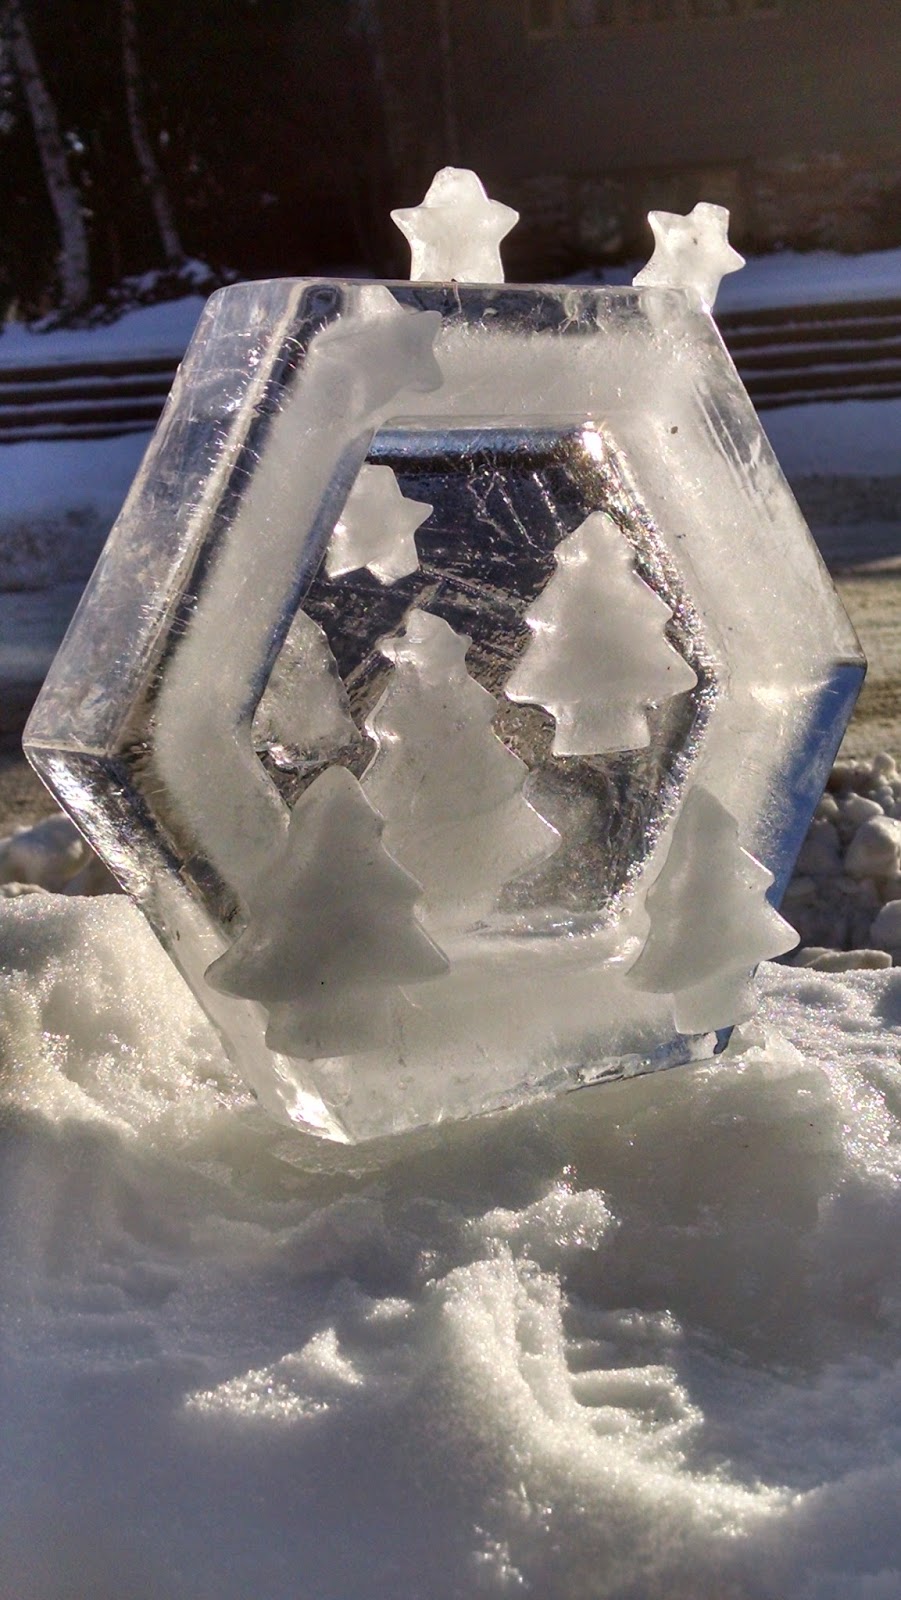
Making Ice Windows with Arctic Ice Lantern molds

Ice Windows offer a solution to some of the limitations of the Arctic Ice Lantern mold.  (It has an unfortunate tendency to crack if it isn't watched closely while freezing, and it often develops a bulgy surface when water escapes from the core during the freezing process and piles up on what should be a smooth base for the finished lantern.  These flaws can be managed when making regular ice lanterns, but they are no problem at all for making these simple ice windows.)


When extreme cold requires frequent monitoring to avoid cracking the mold, you can freeze a small volume of water in the bottom without needing to watch for over-expansion.  If the weather isn't cold enough to freeze a full lantern in a reasonable amount of time, you can still make an ice window fairly quickly.  And if nobody is around at night to see ice lanterns, a display of ice windows can brighten your day by catching natural sunlight.


Other containers with indentations in the base could also be used.  Hot water produces a clearer window.  Add enough water to cover the indented area and allow it to freeze solid.

Many different ice trays are available for making decorations for ice windows.


The basic mold for a hexagonal ice window is the Arctic Ice Lantern mold.  It can be set on another of the same shape, or directly on a mound of snow, or on some flat piece of ice.


The Arctic Ice Lantern mold's indentation 
produces a hexagonal framed window if
it is covered with just a little water.

Adding ice decorations can be very simple:

This ice window has just an ice
gingerbread man, a star in the
window, and another star on top.


A single ice whale inside the frame provides the only decoration for this ice window, which is "open" because not enough water was poured into the mold to cover the indentation.


More complicated designs are possible, with ornaments added to a base or to points around the frame.


The base for this ice window was frozen in a
water bowl for the wild birds that was left
out overnight.  The window frame was
made in an Arctic Ice Lantern mold,
and the trees and snowflakes are
from silicone ice "cube" trays
and muffin /cupcake molds


Return to the introduction page

Saturday, February 27, 2016

Base it on ice

Ice bases enhance your luminaries, raise them to viewing level, and keep them above the new snow.  The extra thickness of a base can extend the life of an ice lantern with a thin floor.  If the candle does melt through the floor, lighting a candle in the base can keep the luminary going for additional days.  A broad base can support an ice lantern on a snowbank, providing a flat surface to which it can be firmly attached.

Without a leg to stand on, these
two ice globes are swallowed
up by 9 inches of new snow

Two Arctic Ice Lanterns are placed with their
open ends together just after unmolding.
They weld together solidly.

The base brings this ice globe to
a good viewing level and adds
thickness to its floor.

This display of ice lanterns for the Enchanted
Forest by Lake of the Isles in Minneapolis
uses a couple different types of base.

An Ikea Fniss wastebasket
was the mold for this base.

A ring of ice shot glasses raises
this ice globe above the base.

Smaller bases can be useful, too.

Plastic party bowls from Party City
make small, simple bases for ice lanterns.

Here, an ice flame that was frozen in
a fluted party bowl is joined to a
base made in the same kind of bowl.
This base holds a luminary firmly in place
and keeps it steady on a snowbank.  The
mold for the base was a lid for a plastic
party tray from Party City.
Here, a globe ice lantern (made in
a punch balloon) provides a base
for another globe.

The base, sitting atop an earlier ice
lantern tower, helps raise the
luminary for viewing.

As the luminary melts through its
floor, the candle moves into the base.
The base effectively provides
extra days of life for this ice lantern.
Here are three examples of a constrained-balloon ice lantern being placed on a base made in the same kind of mold, but without the balloon.  (For constrained-balloon ice lanterns click here.)

An Arctic Ice Lantern with its
angular sides as the base for
a constrained-balloon ice
lantern also made in an
Arctic Ice Lantern mold.

Base and constrained balloon luminary
made in a plastic container from the
AxMan surplus store.

This Ikea Fniss wastebasket
constrained-balloon ice
lantern was thin to begin with
and had melted through its
floor and the end of the base.
It could still be lit from the
lower level, though.

All your base are belong to us.

Return to introductory page.


Cold hands, cold hearts, and other ice decorations

You can make other fun stuff with ice besides ice lanterns.


Freeze a pair of hands in some gloves, and
you can have your ice lantern reaching
out of the "quicksand" for help.
Cheap vinyl or latex gloves will work for this, but heavy neoprene gloves can be used to make more natural-looking hands.
Stick icy hearts onto trees.  Why not?
Rough, thick bark holds the wet snow that I use to glue the hearts in place.  It helps to have cold weather when attaching them.
Erect ice castles
See the pages on funnels and ice castles for more detail.

Do you want to build a snowman?
Maybe not, if you can make
an ice maiden.
Stand some trees in the ice on a baking sheet
and put ducks in the foreground.  Add a little
chilled water to freeze them in place, and set
the finished diorama by a creek full of mallards.
This would look nice with blue LED lighting underneath.

Maybe an ice "gingerbread" house would be fun.  Let your imagination loose and see what happens!


Return to the introductory page.


Friday, February 26, 2016

Single-bucket ice lanterns

Single-bucket ice lanterns

Two types of single-bucket ice lanterns are covered separately -- the Arctic Ice Lantern commercial mold and the Nonni's biscotti bulk package, which makes the easiest ice luminary.  

Many other containers can be used to make ice lanterns, as discussed in the introduction.  

The "bucket" is filled with water and left to freeze.  If the opening is to be in the side that is down during freezing, it should be set on the ground, preferably on snow.  If the opening into the luminary will be at the open end (the top during freezing), the bottom will freeze better if sitting on a cold surface like a tabletop.  

The uneven surface that tends to develop on the free side when water escapes from the core can be reduced by poking or drilling a hole in the thin ice during the freezing process.  This relieves the pressure inside.  Besides making the surface smoother, it reduces the chance that the mold will break.

Unmold single-bucket ice lanterns when the wall is around an inch thick.  Letting it freeze too long can result in a broken mold.  To remove the ice lantern from the mold, I like to set it upside-down in a bathtub or laundry tub with bubble wrap under it.  The lantern will drop down within 5 or 10 minutes and the mold can be lifted off.  The process can be speeded up by gently pouring hot water over the mold.  

The water inside the ice lantern can be poured out, but I like to pour it back into a mold and use it for another luminary, because it is already chilled.

Below are a couple specific examples that have worked well for us.

Ikea "Fniss" wastebasket.  

Fniss wastebasket from Ikea
This can be used to make an inverted truncated cone to use as a base for other ice lanterns or as a wind-resistant ice lantern on its own.  The inverted form is appealing because irregularities in the surface at the open end of the wastebasket don't matter much when that end is down -- and the small end tends not to freeze very solid when the mold sits on the ground, so it is easy to use that as the opening.


The Fniss wastebasket luminary
decorated and used on its own

A Fniss wastebasket as a base
for a globe ice lantern.

See the page for constrained balloon ice lanterns for the next example:

A constrained balloon luminary made
in an Ikea Fniss wastebasket and
decorated for Valentine's Day

We found a simple plastic storage bin at a surplus store.  (AxMan)  Its ridges make the ice lanterns look like Greek pillars, and since the molds were inexpensive, we could make many at once.  These containers have several important features that make them suitable for freezing ice lanterns.

All of the ridges on this container
are oriented so that they do not
interfere with unmolding.  At
each point, the container is
wider, rather than narrower,
toward the upper end.

The inside is smooth, without
anything that would interfere
with unmolding.
There is a slight indentation in the
bottom of the containers, so that
freezing is delayed there, making
it easy to pour out the water from
the core and producing a nice rim.

A simple column made in a
plastic storage container.
Thirty of these columns provided a "grand entry" to the Middlemoon Creekwalk

Ice lantern column lining the entry to
the 2016 Middlemoon Creekwalk

Day-after "ruins" of a row
of columns from the
Enchanted Forest at
the Luminary Loppet
Return to the introductory page.


Sunday, February 21, 2016

Punch balloon icemen

There's an inexpensive toy known as a punch balloon which can be used to make a very useful ice globe, especially for producing classical snowman balls that stack nicely, have consistent thickness, and develop the right shape.  We arrived at this method after trying some ordinary balloons supported in bowls of different sizes -- but that produced elongated shapes that had thin spots, didn't stack well, and didn't look like real snowmen.


A punch balloon (with a football design)
showing the loop through which the
elastic cord is attached opposite the knot.
On the end opposite the knot, the balloon has a loop through which an elastic cord is attached. Blow some air into the balloon (optional - - it can also be added later) and fill it with cold water from the tap. At this point, the elastic cord is down. When there is enough water in the balloon, add some air if you didn't do that at the beginning. This is to produce a flat end, so decide how much air to add depending on how large a flat area you want. Tie a knot to close the balloon and place the knotted side down. If it rests on snow, there will be a soft spot or an opening around where the knot is. Then stretch the elastic cord straight up and attach it to something.


Here, I used a picnic table with holes in the top and fastened the cords with clothespins. The air in the balloon keeps the loop away from the ice and also produces the surface on which the next globe sits. For the top globe, the air pocket can be small, but there should be at least some air to keep the loop free of ice.

For a snowman-shaped iceman, I make three (or 4 for "insurance") globes in different sizes.


An undecorated snow
person made from punch
balloons with only a small
amount of air added, so the
contact points are small.

The same ice "man" with
snowflake hair, heart nose
and mouth, disc eyes and
buttons, and upside-down
trees to suggest a skirt.
When the walls of the globes are thick enough, break the balloons open, pour out the water (or melt through the knot end if necessary and then empty out the water) and assemble the Iceman. Add facial features, clothing items such as buttons, and limbs.


I drilled holes to insert twigs for arms and a hot pepper for a nose, and added small ice discs for eyes and buttons on this iceman.  An ordinary power drill with a twist-drill bit can be used to make holes into ice globes.


The hat was made in two parts - - a shallow plastic lid for a party tray and a metal pet food bowl. The nose is a hot pepper, stuck into a small drilled hole.


This ice person is another for which
I used the upside-down trees to
represent a skirt or apron.  

The features on this ice snowman
are seed-heads from a beebalm
plant, with their stems stuck
into small drilled holes.

Lighting an ice snowman can be
challenging.  For this one, I made
a hole in the side of the lowest
ice globe by freezing it with
another balloon touching it.
The contact patch between
the two balloons freezes
last, but this sometimes
causes the balloon to
break prematurely.


Back to the introductory page.
posted from Bloggeroid