Saturday, January 16, 2016

Roofs for ice castles -- using funnels and balloons

A page just for making ice castle roofs


Branching out from ordinary ice lanterns into ice castles requires some additional techniques.  Here are some ways to create castle features.

A tower made in a plastic bucket,
with a funnel roof supported by
individual ice "cubes."
The funnel-shaped tower roof is familiar from many real castles in Europe.  To make a funnel-shaped roof, seal the hole with a rubber stopper and place the funnel in a bucket of a suitable size to hold it upright.

Funnels for small peaked roofs, freezing
in plastic containers that can also be
used to make the towers.
A funnel with the rubber stopper in place.
This one was ready to unmold.

If the roof is made as a solid piece of ice, it tends to crack, so the key is to unmold it before it freezes all the way through.
Ice has formed about an inch thick
on the wall of the funnel, and also
across the top, but there is still a core
of liquid water inside.  To release that,
I fill a small metal bowl with hot water
(repeatedly as necessary) and rotate
it over the center of the funnel.

The heated bowl melts a hole into the
center of the ice funnel.  At the same
time, I pour some hot water into the
bucket that supports the funnel, to
loosen the ice from the wall.  It is not
necessary to have that water actually
touching the funnel. 
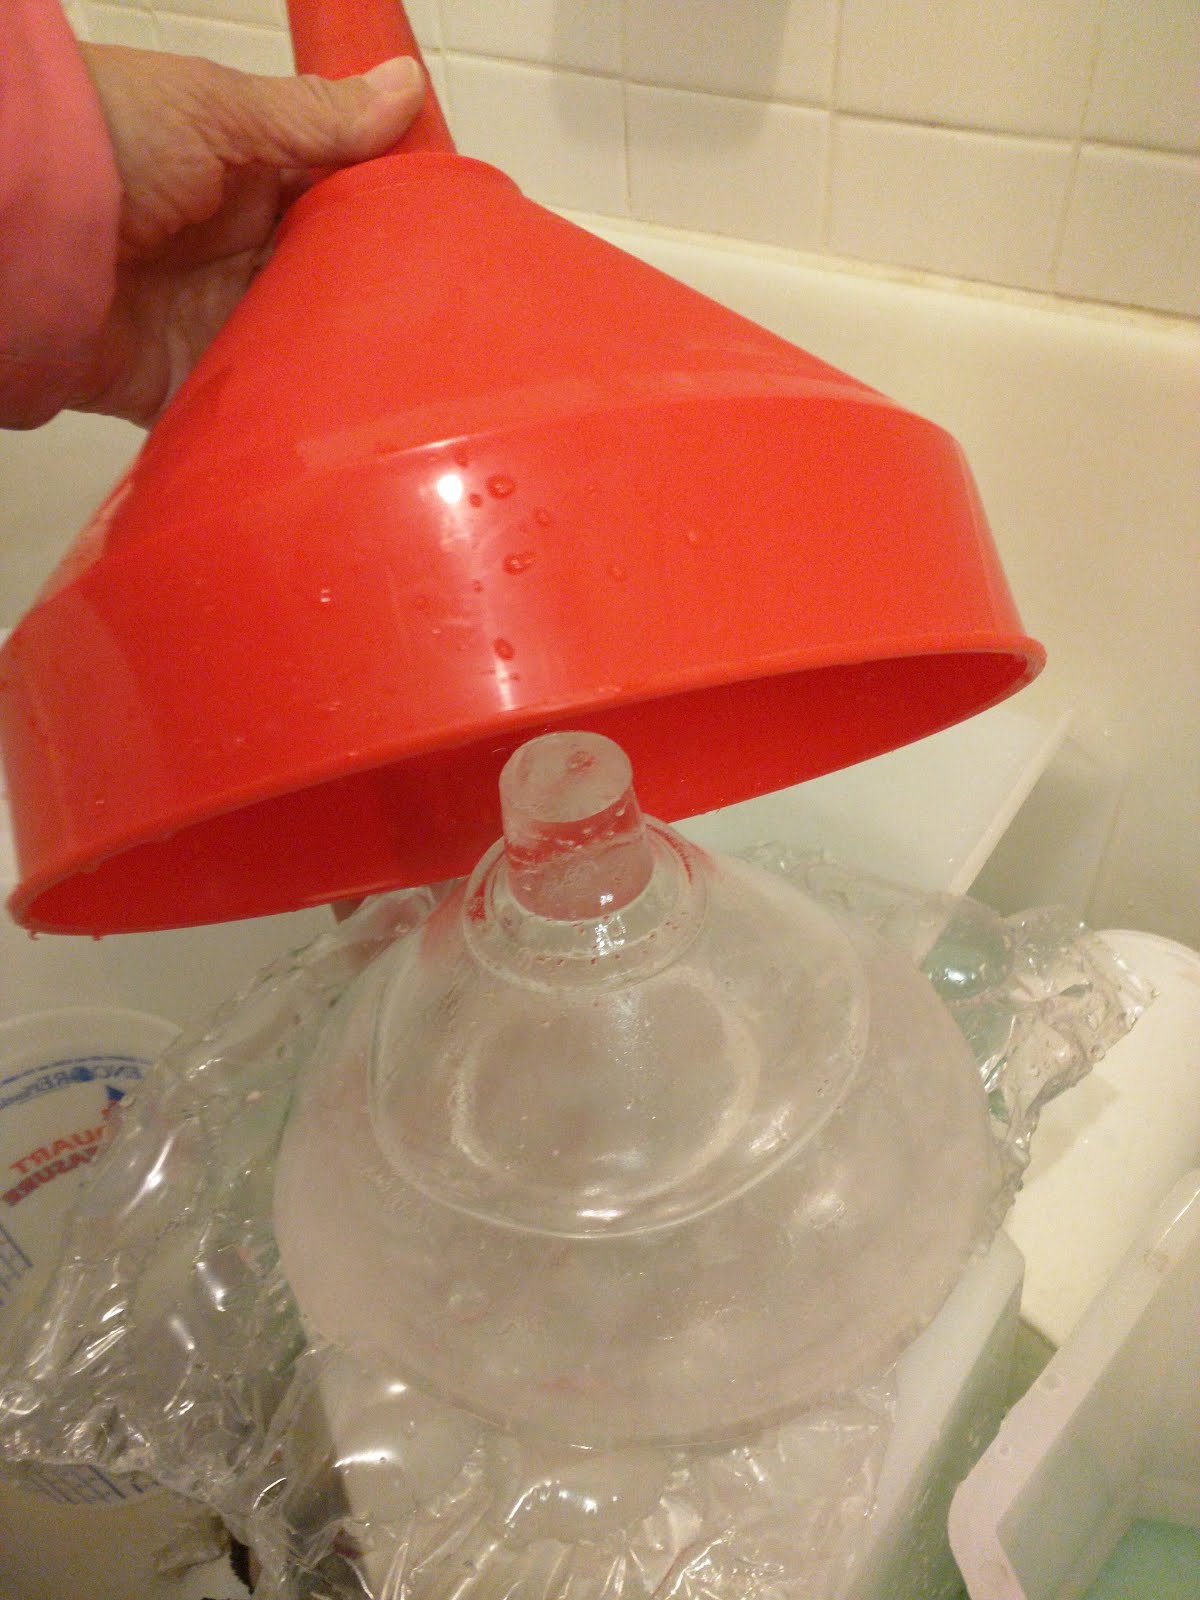
A cradle of bubble wrap protects the
ice roof from breaking while the water
is poured out from the core and the ice
is freed from the mold by pouring more
hot water over the inverted funnel, if
it hasn't already been loosened enough.

The funnel lifts off from the completed
roof.  If the ice cracks during this process
it is often possible to "weld" it back together.
Some funnels release the ice roofs more easily
than others, and putting hot water below the
mold while melting the hole into the core
seems to help make it release better.

Supporting the funnel roof on pillars makes it possible to slip LED light strings into the towers.  Ice shot glasses and various kinds of ice cubes make good pillars.  I have three different trays for making the ice shot glasses.  The one that works best is an 8-cavity pentagonal mold with a Halloween theme, seen here.

These pillars are pentagonal ice shot glasses
that I found on sale after Halloween one year.
They have a raised spiderweb design, but it
doesn't show.  UK source It's from Wilton
with the ID number 2105-4633.
The tower is made of two Arctic Ice Lanterns
stacked together, with shot-glass pillars and
a funnel roof on the top.  Smaller towers
surround it to make a castle complex.
Some towers have rounded roofs, like the onion domes of the Kremlin in Moscow, or of many churches in Central Europe.  Teardrop or hanging-drop ice shapes can be used to create those roofs.

This small tower has a somewhat oversized
roof made from an hanging-drop balloon
ice lantern, in this case lit by an LED
tea light.  Support pillars were made
in a silicone ice cube tray.

Return to the introductory page.

Go to the page for ice castles.

Friday, January 15, 2016

Making an Arare or Hobnail Hailstone Ice Lantern

A difficult but rewarding way to make a fancy ice lantern


After seeing a metal pot with an unusual raised pattern at the Minneapolis Institute of Arts in late 2015, I was inspired to try to duplicate it in an ice lantern.

My first attempt, from an ice lantern
made in the home freezer and decorated
indoors in time to put outside when the
first cold spell arrived.
Soon after that, I began to look for the origin of the pattern and found that there are at least two sources for this design -- both referencing cold precipitation.  The Japanese word "Arare" is sometimes translated as "hailstone" but refers to a type of precipitation that is softer than an ordinary hailstone.  It's known in German as "graupel," and that word is also used in meteorology to indicate balls of snow with an icy coating.  Cast-iron teapots have been produced in Japan for a few centuries with a raised bump pattern with the name "Arare," while a similar glassware pattern that seems to have come from Bohemia and to have been popular in the early 1900's in the US is known as "Hobnail hailstone."

The first small ice lantern that I made this way attracted an unusual amount of attention from passers-by. That, and the connection with arts and crafts related to weather, made me want to keep making these, despite the large amount of work involved, and the cold fingers.

A second Arare / hobnail-hailstone ice lantern

Cold weather kept this Arare ice lantern in
good condition for almost two weeks.
When the second of these luminaries succumbed to sunlight and a slight thaw in January 2016, I began a third one.  It starts as a customary ice lantern in a balloon, with trays of tiny cocktail ice "cubes" in gumdrop shape.


An ice lantern frozen in an ordinary balloon,
placed on cooking parchment to allow it to be
rotated easily.  The trays for the ice "gumdrops"
are filled to less than full capacity, so that the little
"cubes" are slightly concave, which lets them
fit tighter on the convex surface of the luminary.

The 60-cell ice cube tray seen from below
and above.  The dots adhere best to the
convex surface of a globe if they are
slightly concave.  Slightly underfilling
the cells (by sloshing out some water)
produces the best shape for welding on.

As I started making larger Arare
ice lanterns, we ordered a pack
of three more trays from Amazon

I start applying the "bumps" around the top, and add them one row at a time, first dipping them into ice water, then sliding them upward a little over the surface of the ice lantern before pressing them into place.

The first row is the most difficult to
keep in place, which seems odd,
because it's on a level surface.
Once the first two rows were in place, I attended to some other tasks to give those a chance to harden.  It's a difficult balance, keeping the working surface cold enough to "weld" the ice decorations solidly in place, while not risking heat shock from having liquid water touch a surface that is too far below the freezing point (which can crack the ice).  

At the right side of the picture is a
bucket of cold water that came from the
inside of the ice globe when I unmolded
it.  Everything has to be very cold for
this method to work.
There were enough ice "cubes" for five rows, so as soon as I emptied the trays, I dipped them in the ice water and set them to freeze again, leaving the luminary to complete later.

The rows sometimes become uneven.  When that happens, I look for larger or smaller ice "cubes" -- there being quite a bit of variation in the size when the trays are filled a little below the top.  Turning the ice globe while adding the decorations makes it easier to keep the rows even.

Two trays of the ice gumdrops covered under half of this ice globe, which is larger than the two earlier ones, so the decoration required filling our two trays three times (hence the order for more trays).  


The ice globe with five rows of "hailstones"
in place, waiting for another two trays of
them to freeze.

A late-night addition of almost five
more rows, as the temperature dropped
to near zero Fahrenheit.
Making and decorating ice lanterns at below-zero (F) temperatures becomes an "Extreme Sport."  Applying wet pieces of ice with bare fingers requires frequent warm-up stops.  

The water that I was using to moisten the
ice pieces began to freeze in the container
as I added the last few rows.
After setting the completed ice lantern on another ice globe that was turned upside down, I mounted the finished luminary on an earlier ice base.
Finished and ready for evening, the
"Arare" ice luminary glows in the
morning sunlight.
There's a "magic" moment just after sunset when a deep blue spreads over the sky, but the horizon still glows in gold and green..  At that point, the candle-lit ice lanterns shine with an intense inner fire.

The Arare ice lantern reveals the
glow that makes it a special favorite.

Despite using an upside-down ice lantern for a base, so that there was an extra layer of ice to support the candle, I couldn't keep the floor of the Arare lantern from melting through.  Water collected in the "fishbowl" below, and I ended up using a floating candle there to illuminate the lantern as it gradually melted away.  Although the base was an upside-down ice lantern, with an opening on the bottom, it had sealed so tightly to the column of earlier ice lanterns that it held a pool of icy water.

A floating candle in the ice lantern that
served as a base provided the light for
the luminary's last few days.

Losing its upper rings of ice
decorations and having its floor
melt away couldn't dim the beauty
of this special ice luminary.

Further ice lanterns of this type included the fourth one, which I made for the Luminary Loppet "Enchanted Forest" by Lake of the Isles:

An Arare ice lantern at the Minneapolis
Luminary Loppet event February 6, 2016

... and another ice lantern for our home:

My fifth Arare ice lantern, mounted
on a globe made in a punch balloon.
...followed by the largest so far, made on a Wintercraft ice globe and covered with more than 400 of the gumdrop-shaped ice "cubes" for the Middlemoon Creekwalk south of Lake Harriet in Minneapolis from February 14 through 17, 2016.

This luminary took three days
to make, because cold temperatures
limited the amount of time I could
work on it outdoors.

At the Middlemoon Creekwalk 2016, we ran out of time for setting up displays on Valentine's Day -- the first night that the lanterns were lit.  Additional ice from Wintercraft's extensive collection of ice glass provided a stunning backdrop on the second night and for the later lightings.

The sixth and largest of the
Arare ice lanterns, on display
at the Middlemoon Creekwalk


Return to the introductory page.


Tuesday, January 12, 2016

Hanging drop ice shapes

The hanging drop, an advanced technique


A special variant of the teardrop- or flame-shaped ice lantern shape is the hanging drop.  It's made by filling a balloon with water, knotting the end, and then hanging the balloon by the knot.

Ice shapes must have their liquid cores released to prevent shattering.

If the drops are frozen with nothing touching them, it is necessary to melt a hole to let the water out.  I hold them pointy-side-down in bubble wrap and melt holes in the bulgy end, using a flat-bottomed metal bowl full of hot water.

Another way to make an entry hole is to hang two balloons close together so that they touch, creating unfrozen spots on the sides.

It is also possible to create a hole in the bottom of a hanging drop by positioning it above an insulating object, just touching so that the contact point remains open.

I froze this ice-drop in a 12"
balloon, hung by its knot until
the wall was close to an inch
thick.  I melted a hole into the
core to release the water inside.

Making some hanging-drop ice
shapes, using clothespins to secure
the knots to the shelves in a
little wire-frame greenhouse.
Melting a hole in the ice lantern after unmolding it is inconvenient, time-consuming, and difficult.  If the hole is melted in the bottom, it's complicated to get lights in and out.  The next batch of hanging-drop lanterns that I made were in pairs, to produce an entry hole in the side.

In this little portable greenhouse, the end of the balloon can just be twisted around the wire of the shelf and fastened with a clothespin.

More than a dozen pairs of balloons
filled with cold water and suspended
so that there is a contact point that
remains open when the wall freezes

The balloon has been punctured, and
water is running out from the hole in the
side of the ice lantern, as the split in the
balloon extends rapidly upward.

The completed ice lantern, with the balloon
nearly completely removed.  

These ice lanterns are being lit by
a string of 25 lights, each inserted
into the side of one of the lanterns.
Although the hanging-drop ice lanterns are easy to make, they are challenging to illuminate.  Candles need a chimney, which these don't have, so either they are lit from outside, have LED lights inside, or are displayed as unlit ice objects.

With a hole melted into the
bottom of the hanging drop
ice lantern on top of the two
Wintercraft ice globes, it was
fairly easy to "weld" it in place
using the water that was
draining from the core.
This hanging drop ice lantern
is lit by a small electric tea
light, inserted through a
hole in the side.  

Return to the introductory page.


Sunday, January 10, 2016

Ice lanterns -- what could go wrong?

Learning from mistakes

The great thing about ice lanterns is that many failures can be salvaged.  There aren't a lot of disasters in making ice luminaries.

Even the ice lanterns that crack during unmolding can often be pressed back together, because ice tends to weld in place with a little force applied.


Although this ice globe cracked (from just pouring
the water out of the bottom of the core after the upper
parts of the globe had cooled below the freezing point),
the cracks healed themselves without actually separating.
Here's an ice globe that cracked during
unmolding, with a large piece breaking off.
I simply pressed it back into place, and it
remained intact for days, with the cracked
side placed at the back, where it isn't noticed.

Ice lantern problems -- why they happen, and what you can do about them

What makes molds break?
One big issue is the expansion and contraction of water and ice.  Water contracts and gets denser as it cools, up to (or down to) a point.  That point is at about 40 degrees F (4 degrees C).  Below that temperature, ice crystals are beginning to form, and they are less dense than water.  At the freezing point, the solidifying water expands and takes up more space.  What does that mean for an ice lantern in a mold?  
Water shooting up from an ice lantern
Why is water shooting a foot up in the air from this ice lantern?  It's because of expansion during freezing.  The open top froze over, and ice began to form on the walls of the mold.  As the water turned to ice, it expanded.  This was happening during a very cold night, so the ice on the top was extra-thick and hard. To relieve the pressure, I melted a hole in the top and the water shot out, making a foot-high geyser.  

If the water in the core had continued to freeze and expand, it would eventually have broken the mold.

Why are some ice lanterns lumpy on the side that was open?
 Normally when the pressure on the water in the core builds up, some water finds a way up through the crust on top and wells up on the surface, where it either spreads out all over or freezes into lumps.  Differences in air temperature, wind speed, initial water temperature, vibration from traffic, and probably a host of other factors determine how this happens.

Using a constrained balloon inside the mold produces a flatter base and is a possible solution to this problem. (See how to use balloons inside other molds here.)

An electric drill with a quarter-inch (or so) bit can be used to drill a hole in the center of an ice lantern in a bucket as it starts to freeze over.  This releases the water in the core so that it doesn't build up as much pressure and so that it spreads more evenly across the surface.  The process may need to be repeated.  You can also poke a hole, but that tends to shatter the ice rather than make a nice hole.  The risk of breaking the mold is also decreased if the pressure is released.

The area on the upper right is raised above the
smooth surface of the rest of this ice lantern's base.

Why are some ice lanterns crystal clear and some have strings of bubbles all over?
This is only a problem if you insist on having one or the other.  The easiest solution is to be happy with either.  That's easy with ice lanterns, but if you were making metal castings, you would have to worry about this process, because you obviously wouldn't want your metal to be weakened by bubble chains. Knowing about bubble formation is also important for understanding ice stability in glaciers and icecaps.  A lot of research has been devoted to the conditions that promote or inhibit bubble development.  More bubbles form if there is more gas dissolved in the water.  The size and pattern of bubble formation is related to the speed of freezing. Chains form with slow freezing.  Bursts of tiny bubbles develop with rapid freezing.  
Many bubble trails.

Can you cut yourself on ice lanterns?
Yes.

Sharp edges do form on ice.
What is temperature shock and when can it be a problem?
Ice cracks if it is exposed to a sudden change in temperature.  This is particularly likely with water splashing onto ice that has chilled below the freezing point.  If you want to join two pieces of ice together, the best time to do it is when they have just been unmolded and have not cooled further.  Small amounts of cold water can be used to weld pieces of ice together, but be cautious and expect cracking if the water is too much warmer than the ice or the amount of water is too large.

Take another look at the ice globe from the beginning
of this page.  Those cracks were caused by a temperature
shock that surprised me.  I had taken a few minutes to put
the little "crown" of cocktail ice cubes around the opening,
leaving just a little cold water in the core while doing that.
When I tipped the lantern to pour out the cold water, the
wall of the globe had chilled enough in the sub-zero air
that the temperature shock caused it to crack.

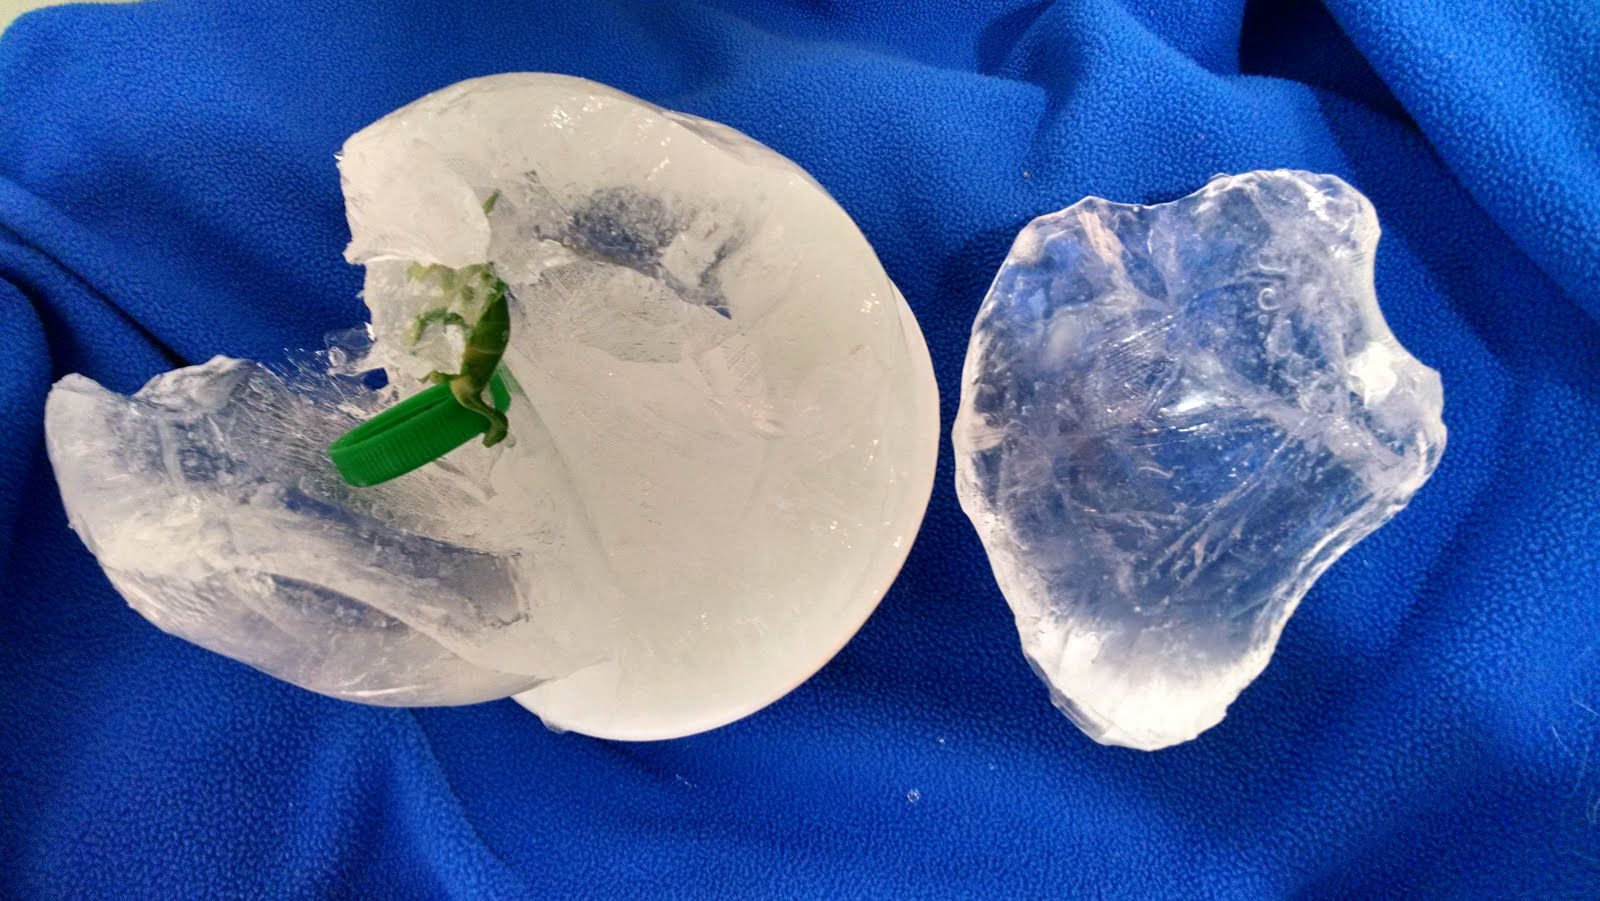
This was an experiment with a small
dinosaur -- trying to freeze it inside an
ice globe -- with the result that the
globe simply exploded.

Wall thickness

It's hard to know when to unmold an ice lantern, and there are mistakes that affect wall strength and thickness.  

Avoid setting an ice lantern to freeze in a warm place (duh!).  That seems obvious, but it's sometimes a surprise how warm the sun can be, how much heat a house emits, and how hot the dryer exhaust is.  Don't put a dark balloon in the sun.  

Don't try to freeze ice lanterns at temperatures near 32 degrees F (zero C).  It takes too long, and the ice quality ends up being poor.  Try to aim for temperatures between zero and 23 F (minus 17 and minus 5 C) or plan on making adjustments.

A cold wind speeds the freezing process but may make it uneven.

When freezing ice lanterns at below-zero temperatures (below minus 17 C), check frequently to avoid freezing through and potentially cracking a mold.  Some molds are especially vulnerable to cracking;  the Arctic Ice Lantern is more vulnerable than many others -- watch it carefully.

Don't let snow accumulate on an ice globe or bucket lantern during freezing.  It can cause weak spots.  

Don't set ice lanterns too close together while freezing.  They can keep the air between them enough warmer to delay freezing on the sides that are near each other.  This can, however, be used to keep a spot open on the side of an ice flame or hanging drop;  freeze them in pairs that are touching.  The contact patch will stay open.  

Sitting on a warm or insulated surface will delay freezing.  If the bottom of the mold is the place that you want an opening to be formed, set it on snow or on ground that provides some insulation.  If the bottom needs to freeze solid, either pre-freeze a layer of ice in your bucket or make sure the bucket isn't resting on an insulating surface.  

If you have a big, important ice globe freezing, consider making some less critical ones at the same time.  You can unmold the cheap ones to get an idea whether it's been long enough for the important one. 

If the area that should be open or soft has frozen hard on your ice lantern when you go to unmold it, you can melt into the liquid core using a flat-bottomed metal bowl with hot water in it.  


This ice lantern had frozen almost solid,
leaving only a small liquid core.  It's
possible to melt a smooth-edged round
hole using a metal bowl with hot water.
As long as there is liquid water in the core, and for a short time after pouring it out, the ice lantern will be fairly resistant to thermal stress.  When the water is gone, the whole ice lantern will chill to the ambient temperature, and you have to be much more careful about splashing water on it.


See what happens when sunlight and warmth attack ice lanterns.


Return to the introductory page.


Freezing things into ice lanterns

Freezing things into ice lanterns


One of the most popular ways to decorate ice lanterns is to freeze things into them.  I don't do this much, because it is a lot easier to add decorations to the outside.  If you really want to make beautiful ice lanterns with frozen flowers or figures inside, Wintercraft's Jen Hedberg is working on a book that will share her techniques.  Here's one of her stunning creations.

A candlelit ice globe with a bouquet inside it, made by
Jen Hedberg from Wintercraft and displayed in March
2015 at the Middlemoon Creekwalk in Minneapolis.

My attempt to make an ice globe with a figure inside didn't turn out quite so well....
A dinosaur in an ice globe -- just
guessing how to freeze it in place.
Ice globe explosion -- the end of the dinosaurs, I guess.
Ice can be tricky.  There's a lot of expansion as it freezes, and it's very sensitive to temperature shock if it comes in contact with water that is much warmer than the temperature of the ice.  (For instance, wetting a frozen ice lantern that has cooled to much below the freezing point -- even if it is done with very cold water -- is likely to crack it.)  I'm looking forward to learning the physics of getting things frozen into ice globes, but I'm not there yet.

Somewhat more successful were a couple of ice lanterns with foliage and flower petals frozen into the rims.  I used the Arctic Ice Lantern molds and picked marigold and cornflower blooms, and asparagus foliage, just after the first frost in late 2014.
The last flowers of 2014, still with colorful petals.
Freezing flowers and foliage into the
first inch or so of the Arctic Ice Lantern
molds.  The plant material tends to float, so
I let it freeze hard before adding more water.
Keeping the added material from floating to the top requires doing something to hold it in place.  I've seen hot-melt glue mentioned, and that's what I tried for fastening the dinosaur in place.  Freezing just a rim of ice with stuff in it did work for the Arctic Ice Lantern, but it wasn't a method that I would bother with again.  
Flower petals and asparagus foliage
frozen into the rim of an Arctic Ice Lantern,
with a couple of petals that escaped from the
pre-frozen base and migrated up through the
water.  The added water, incidentally, has to
be very cold, or it will soften the ice around
the rim and let it break loose and float up.
I think this is a technique for ice lanterns that will be viewed close up, rather than placed along a street or sidewalk.
Night view of an ice lantern with a
rim decorated in foliage and flowers.
If you're using just a couple of ice lanterns as centerpieces on a table, freezing something inside is probably something you'd want to learn how to do.  If I figure it out some time, I'll post an update.  Otherwise, watch Wintercraft's website for an announcement of Jen Hedberg's book on making ice lanterns.